
Aprende en Comunidad
Avalados por :


¡Acceso SAP S/4HANA desde $100!
Acceso a SAPCómo abordar una solicitud de cliente específica en PMGM con Servicios Inteligentes y Reglas de Negocio
- Creado 01/03/2024
- Modificado 01/03/2024
- 60 Vistas
0
Cargando...
Hello Readers
I am writing this blog to make you aware of a very specific customer requirement in PMGM that I had addressed using a combination of Intelligent Services and Business Rules.
Problem Statement: Auto launch confirmation assessment forms on the 14th day of joining and the start date of the form should be the hire date of the employee and the end/due date should be 31/12/9999, e.g. If the employee joins on 1st April 20xx, then the form should launch on 14th April 20xx and the start date be 01.04.20xx and the end/due date should be 31.12.9999.
While one part of the requirement (auto launch of confirmation form) is achievable through the " Manage Scheduled Reviews " tool in PMGM, the latter part where the end/due dates need to be hardcoded cannot be achieved
Solution Design:
To achieve this requirement, we will make use of the following elements -
The solution begins with updating the business configuration by adding the pm-form field at the following two places -
To update, in the Search for actions or people tab, type Manage Business Configuration. Click on jobInfo and add the pm-form field as shown in the screenshot below.
Click on jobInfo_employee in the left panel.
Add the pm-form field
Step 2 is to navigate to the Intelligent Services Center from the search bar.
Look for “Initiate Performance Form” and make sure it is available in the Intelligent Services Centre page.
Step 3 is to configure the business rule. Navigate to the “ Configure Business Rules ” page from the search bar.
Create a new “ Basic ” rule as shown in the figure below.
Step 4 is to update the dates in the Confirmation Assessment Form. To update, navigate to the Form Template Settings page, select the Confirmation Assessment Form and update the dates as shown in the figure below –
Step 5 is to create an off cycle batch group for the target population to which this rule will be applicable. To create one, navigate to” Manage Off Cycle Event Batch Groups ”. Click on Create New Group button and create a group in trhe same way as we create a permission group. Make sure to use such a criteria that all the eligible employees are covered.
Step 6 is to configure Off Cycle Batch Event under Manage Data. To create one, navigate to the Manage Data page. Under “Create New” select Off Cycle Event Batch and create it as shown in the figure below.

I am writing this blog to make you aware of a very specific customer requirement in PMGM that I had addressed using a combination of Intelligent Services and Business Rules.
Problem Statement: Auto launch confirmation assessment forms on the 14th day of joining and the start date of the form should be the hire date of the employee and the end/due date should be 31/12/9999, e.g. If the employee joins on 1st April 20xx, then the form should launch on 14th April 20xx and the start date be 01.04.20xx and the end/due date should be 31.12.9999.
While one part of the requirement (auto launch of confirmation form) is achievable through the " Manage Scheduled Reviews " tool in PMGM, the latter part where the end/due dates need to be hardcoded cannot be achieved
Solution Design:
To achieve this requirement, we will make use of the following elements -
- Manage Business Configuration
- Intelligent Services Centre (ISC)
- Business Rules
- Form Template Settings
- Provisioning Jobs
The solution begins with updating the business configuration by adding the pm-form field at the following two places -
- jobInfo
- jobInfo_employee
To update, in the Search for actions or people tab, type Manage Business Configuration. Click on jobInfo and add the pm-form field as shown in the screenshot below.
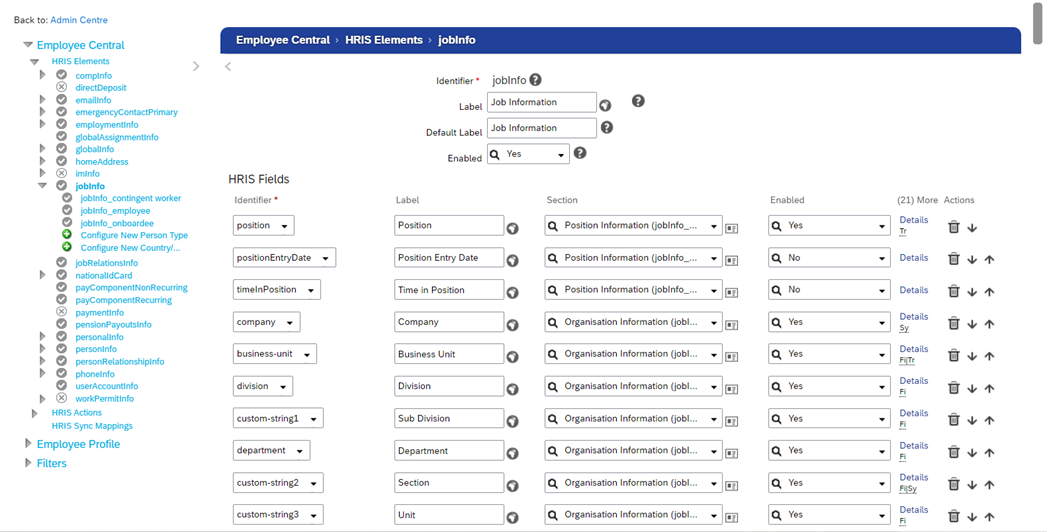
Image 1
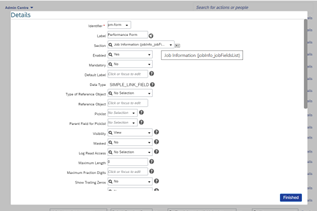
Image 2
Click on jobInfo_employee in the left panel.
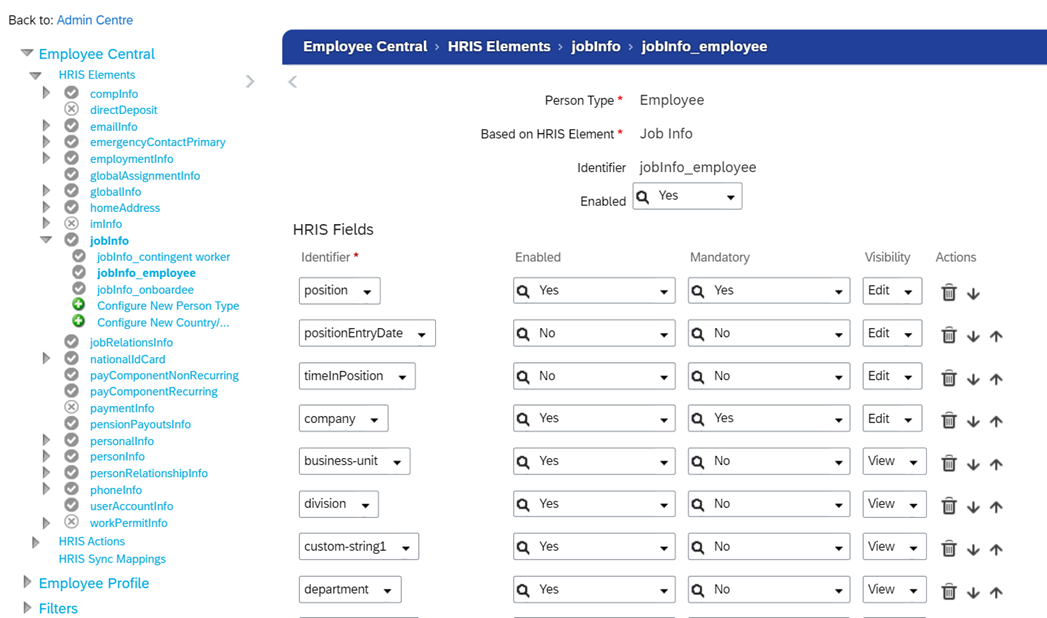
Image 3
Add the pm-form field
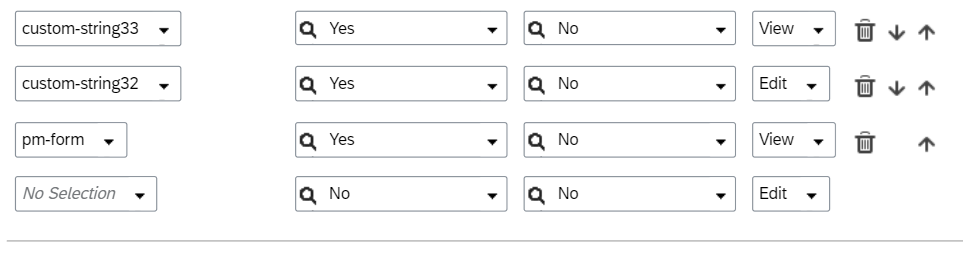
Image 4
Step 2 is to navigate to the Intelligent Services Center from the search bar.
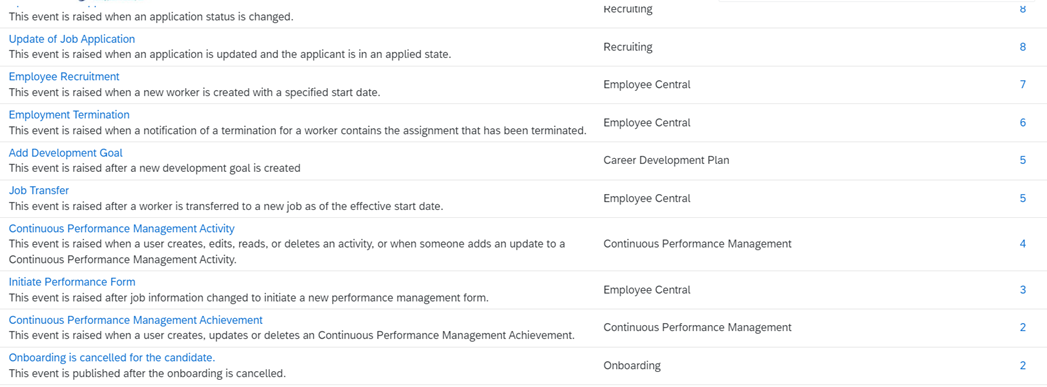
Image 5
Look for “Initiate Performance Form” and make sure it is available in the Intelligent Services Centre page.
Step 3 is to configure the business rule. Navigate to the “ Configure Business Rules ” page from the search bar.
Create a new “ Basic ” rule as shown in the figure below.
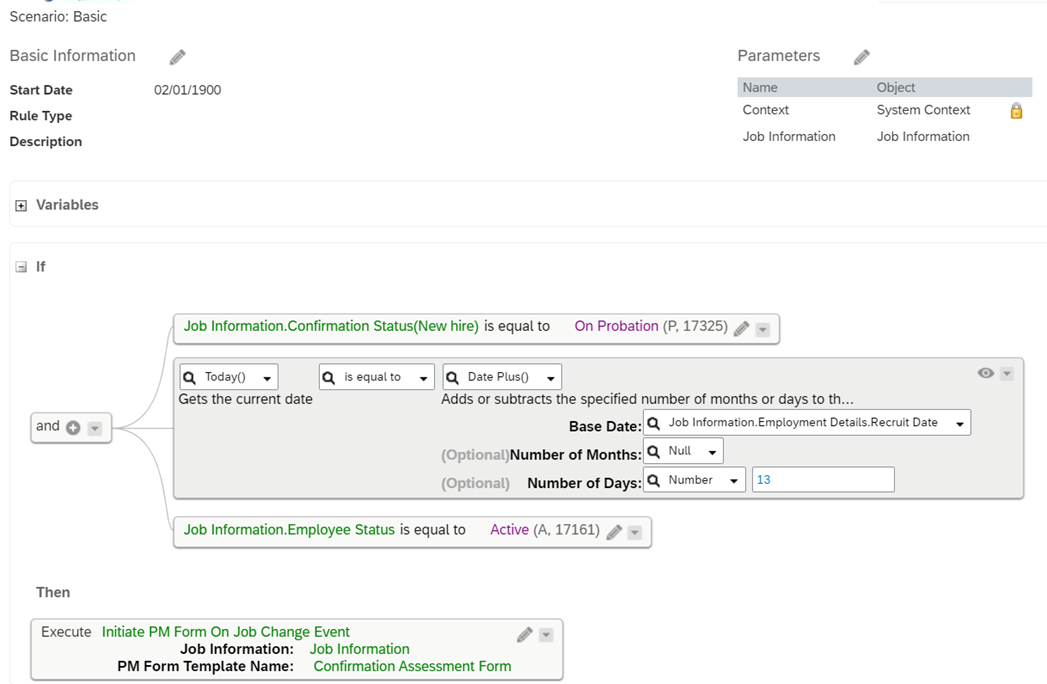
Image 6
Step 4 is to update the dates in the Confirmation Assessment Form. To update, navigate to the Form Template Settings page, select the Confirmation Assessment Form and update the dates as shown in the figure below –
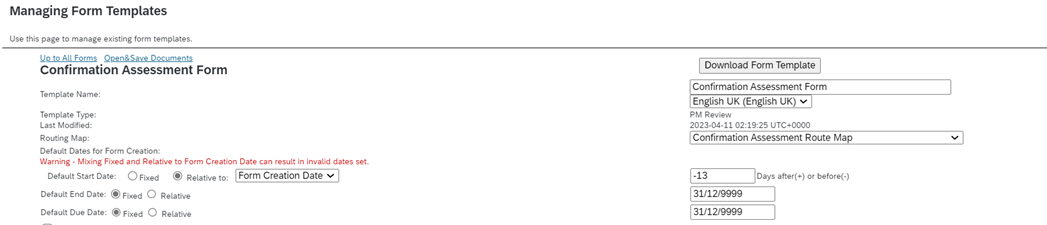
Image 7
Step 5 is to create an off cycle batch group for the target population to which this rule will be applicable. To create one, navigate to” Manage Off Cycle Event Batch Groups ”. Click on Create New Group button and create a group in trhe same way as we create a permission group. Make sure to use such a criteria that all the eligible employees are covered.
Step 6 is to configure Off Cycle Batch Event under Manage Data. To create one, navigate to the Manage Data page. Under “Create New” select Off Cycle Event Batch and create it as shown in the figure below.

Pedro Pascal
Se unió el 07/03/2018
Facebook
Twitter
Pinterest
Telegram
Linkedin
Whatsapp
Sin respuestas
 No hay respuestas para mostrar
Se el primero en responder
No hay respuestas para mostrar
Se el primero en responder
© 2025 Copyright. Todos los derechos reservados.
Desarrollado por Prime Institute
Hola ¿Puedo ayudarte?